| XLint Performance |
|
Cam
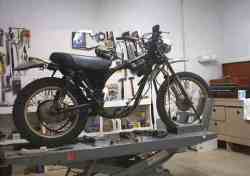
sprocket mounting jig This bike had gone from knee wrenching stock compression to a mere 30 lbs, and would not start. The XLs are bad to experience a carbon build-up between the valve surfaces and seats. Once on the lift, the tappet covers are removed and the valve adjusters backed out all the way. Compression was checked one more time, just to make sure an adjuster had not tightened-up, keeping a valve from seating. The compression was still low. Also, using the shop compressor, and taking a drilled rubber stopper on the end of a compressed air valve, pressing the stopper over the spark plug hole, air could be heard exiting the exhaust opening. The engine must come out of the frame to remove the head. But first, it's easier to remove the cam cover, cam sprocket and cam, making sure to tie off the cam chain with wire to prevent the chain from falling into the engine bottom. Also, the cam chain adjuster must be loosened to allow slack in the chain. It's a little difficult to remove the cam sprocket and cam if this is your first time, but it's do-able, just take your time, and rock the top of the sprocket towards you. Next, the head bolts are removed, all of them, especially the two at the bottom of the cylinder; and with a rubber mallet, carefully free the head from the cylinder. Be careful, don't bend any fins, and don't be tempted to use a screwdriver as a pry bar between the head and cylinder, you will mar the sealing surface. |
 |
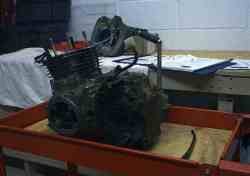
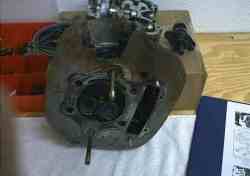
| Once the head is free from the cylinder the engine can be removed from the frame. |
 |
| An inexpensive shop cart sure makes it easier on the back, lifting the engine out and placing it right on the cart. The head easily slips off, the wire keeping the cam chain from falling into the crank case. |
 |
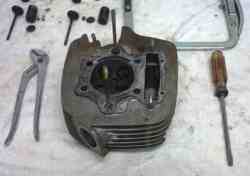
| With some squirts of brake cleaner the top of the piston and the mating surfaces are looking good. There are no signs of cylinder wall scoring or adverse signs of detonation on the piston top. |
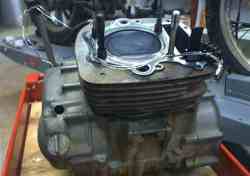 |
| The cam lobs and rocker surfaces look fine, they should, the bike shows a mere 9,700 miles on the odometer, and appears to have had good maintenance (frequent oil changes and level checking is the key). The cam plain-bearing surfaces in the head also look good. |
 |
| A quick check of valve/seat sealing can be done by filling the ports with kerosene. Just as suspected, kerosene is seeping around the valves. |
 |
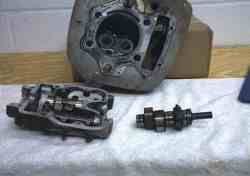
| Using an
inexpensive Sears brand automotive valve compressor (with the tip
ground down to fit the smaller motorcycle keepers), the valves are
removed.
A simple valve lapping would probably cure the problem. But, since all the work is in the removal and assembly, it's prudent to let a "high-dollar" machine shop go over the head, and check for bent valves, valve stem to valve guide tolerances, valve spring compression, etc. It's only a tad more money, and the shop has the expensive measuring devices to check the clearances and tolerances. During assembly, if the rubber valve guide oil seals show any wear then replace them with new Honda items. |
 |
| With a new head gasket, the bike is ready for assembly. |